Friday, August 29, 2014

It's A Sister Thing - part 3!

Yes, this is the last installment in my "It's A Sister Thing" reveal.  I told you there were a LOT of photos.  I did loose some of the photos, so there isn't a picture of all of the other goodies I sent to Jeanie.  You can go to her blog post here to see her photos.  While you are there, take a look around.  She does fantastic work!

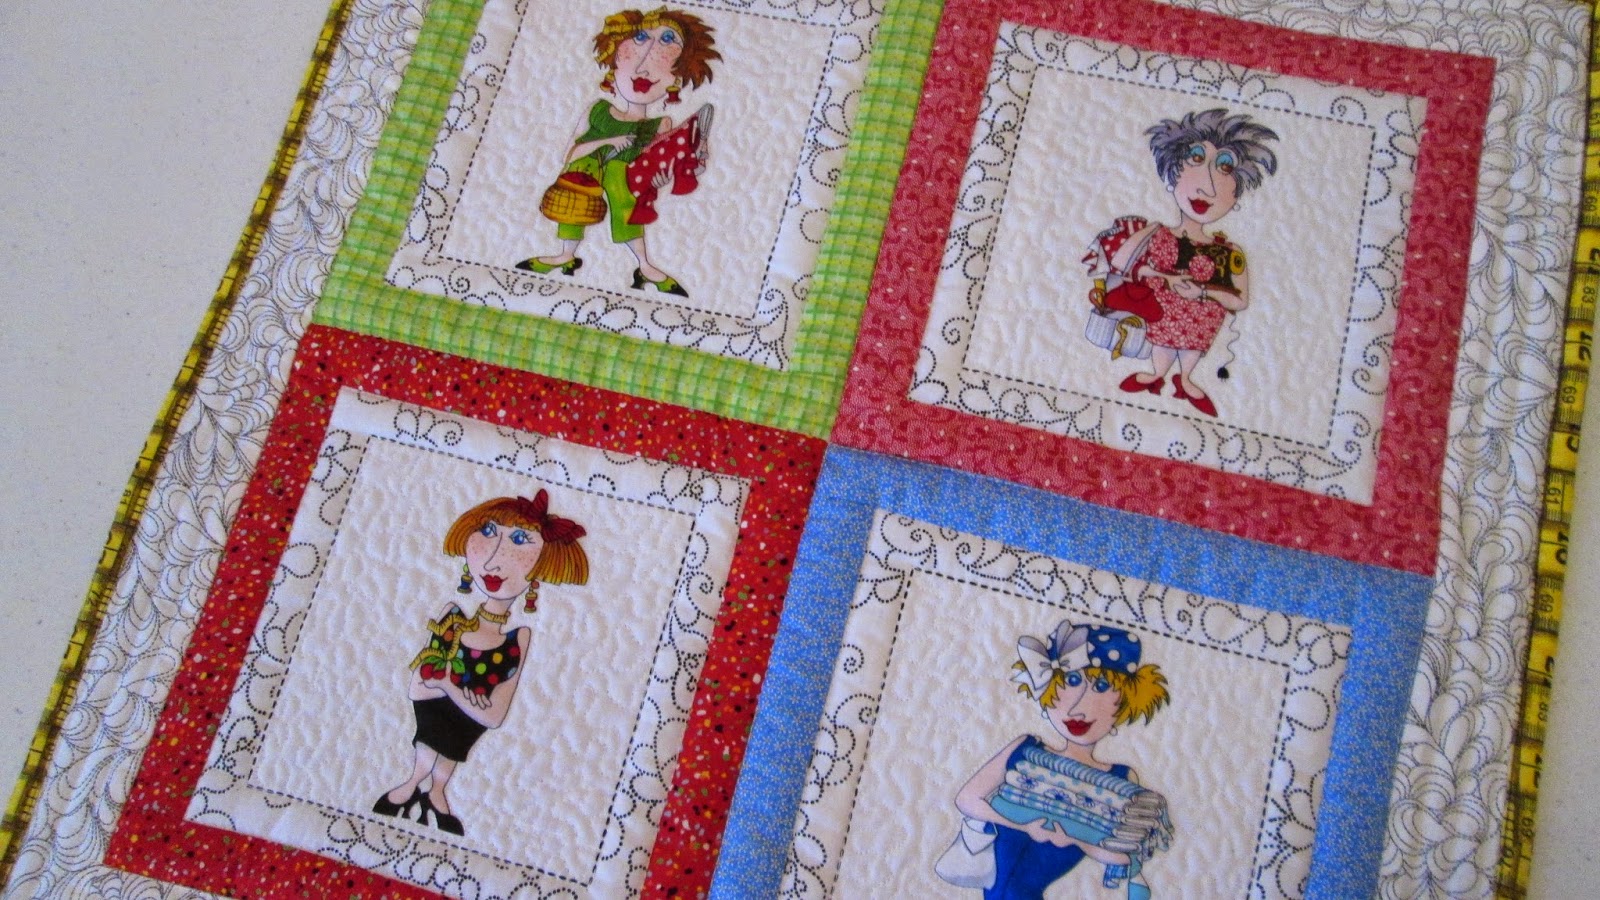
I found these ladies in my stash, and thought they were so appropriate for an avid sewer/quilter.  I had a lot of fun with them.  Something like this is a great way to practice your FMQ.

 Look at these faces, you simply have to smile!  I first chose the coordinating fabric for the sashing.
 Then the lay out and then the border fabric. 
 I outline quilted each diva, then meander quilted the inside of each square.
I quilted in the ditch around the sashing.
 And straight line quilted on the outside border.  I sewed the binding on by machine...
 ...added a label...
...and she was ready to go!  Yes, this is the last installment of my "It's A Sister Thing" reveal.  I want to thank Michelle for allowing me to participate and for giving me Jeanie as a partner.

Linking to: Can I Get a Whoop? Whoop! at Confessions of a Fabric Addict!  Finish it up Friday! at Crazy Mom Quilts!

Sunday, August 24, 2014

It's A Sister Thing - part 2!

If you remember in my last post, I told you about Jeanie, my swap partner from It's A Sister Thing - 2014 swap.  I had to many photos to share in one post, so here is the second installment in my reveal post.

Here is a tutorial like post. How to make a strawberry pincushion!

 I used a 5 in circle.  You can make it as large as you want.  Remember, your strawberry will end up approximately 1/2 the size of the circle you cut.  Cut your circle in half.
 Fold the half circle in half and mark 1/4" seam and round off the bottom corner.

 After you have sewn the seam, trim off the bottom corner.
 Turn right side out.
 Take a needle and tread.  Make sure you have more thread then needed to make a gathering stitch around the top of the strawberry.  About 1/8" from the top of the opening.  Gather.
 I use crushed walnut shells to fill my pincushions.  It took about 1 tsp. for this size.  You can purchase the walnut shells at your local pet supply place or on line.  You will need the weight to keep it in place.  If you use just fiber fill, it will get away from you when using it.
 I top off the walnut shells with a bit of batting.  That keeps the shells in.  Pull your thread tight.
 Pull the thread back and forth through the top, catching fabric as you go, to close it up.  Tie the thread off.
 Now for the top knot.  Cut a piece of fabric 2" smaller then the circle you used for your strawberry.  In this case, I used a 31/2 in. circle.  Your yo-yo will end up 1/2 the size of the circle you cut.  Again, take a needle and thread, run a gathering stitch and pull it tight.
 Tie off the thread as you did to close up the top of your strawberry.  I used a little button to make it fun and fancy!  I also used hot glue to attach it to the top of the strawberry.  You can attach it with needle and thread if you wish.
And here you have a little strawberry pincushion.  It is approx. 2" long.  You will be able to make 2 pincushions out of one circle!

It's A Sister Thing!!!

I am so excited to have been part of "It's A Sister Thing" swap with Michelle over at Quilts From My Crayon Box!!  She assigned us our partners, then we got to 'stalk' them in order to get to know them and their likes.  How fun is that?

I got the wonderful Jeanie at Gracie and Oliver Arts!  What a fun blog.  It was fun to go back in her archives and see what she has been up to, the kind of fabrics and quilts she likes.  She is one busy women!  After exploring for a bit, I know exactly what I was going to make for her.

Jeanie had a beloved cat named Oliver, and I wanted to pay tribute to him with this little pouch.
This is a fast and easy pouch by Moda that is free, on line.  It's called 'Across the Pond Pouch'.  It's a great scrap buster!
 I thought that the bright blue zipper would and a little splash!
My phone lying there give an idea of the size.  Approx. 3x8.  It would be great for sunglasses, even the big ones out today.
 
She loved it all, so it was worth every thought and stitch!
 
I made her other things too, but there isn't room in one post for all the photos!  I'll continue on with the other items with my next post.
 
 
Linking to:Sew Cute Tuesday at Blossom Heart Quilts.

Wednesday, August 20, 2014

My favorite blogland children!

Yep, Lorna from Sew Fresh Quilts has two of the sweetest kids.  Even though I have never met them, they call me Auntie Vicki!  I couldn't send a package to Lorna without including something for these two precious kids.

 The first thing was to find appropriate fabric.  They are both in high school, and I didn't want it to be to juvenile.
 I had a lot of fun quilting these.  On Erin's, I outlined each flower.  Then I added the zipper.
 Each one has a pocket for their ear buds.  I'm thinking iPod pouch.

 Russell is a baseball star on his team, and I wanted him not to be embarrassed to carry this pouch!  I quilted around the baseballs.

I added a personal note inside each one, and they love them!!!!  That makes this Auntie feel great.

This pattern is free over at Sew Can She.  Take a look to see all the free patterns she has to offer!

Linking to: Let's Bee Social at Sew Fresh Quilts.

Sunday, August 17, 2014

Special friends deserve special gifts!

I'm sure that there are a lot of us out in blogland that have made some great friends over the years.  I have several special friends that I have made also.  One of them is Lorna from Sew Fresh Quilts!


How many of you know that Lorna used to be a motorcycle rider?  I mean driver!  I thought that this fabric was a must for her.
 

And the 'tweet' blue birds are perfect on the inside.


This little panel is so her. I had so much fun FMQing in each segment.  It is 12x12.  Lorna is the one who taught me to do the corner hangers.


I also sent her a stack of four FQ.  I wanted to do a little personal challenge.  We are each to make what we want and can add other fabrics along the way.  I thought of her right away when I saw these Cardinals.  I wonder what she'll make with hers?

My next post is about what I made for Erin and Russell, her wonderful children.  Love you kids!!!!

Linking to: Fabric Tuesday  at Quilt Story.

Wednesday, August 13, 2014

Here are a couple of quick projects!


The other week, I was cleaning out my stash and ran across these 3 pre-printed panels.  I knew it would take literally minutes to get them sewed up, so I got them trimmed and put together!


40x43


24x40


42x47

The Rug Rats panel had to be cut apart and sashing applied.  I remember these characters from when my kids were small!


And just as I thought....they were all done in less then 1 1/2 hrs.  I'm going to end up with quite a few flimsies to turn in in September!


Linking to : Let's Bee Social with Lorna at Sew Fresh Quilts!!  WIP Wednesday with Freshly Pieced Modern Quilts!

Monday, August 11, 2014

I love medallion quilts!

I really love all of the beautiful medallion quilts that have been on blogs lately.  They seem so intimidating, but I wanted to make one myself.  I had the perfect pattern, but none of my fabrics included enough yardage to make it all match, so........


I gathered together a bunch of coordinating colors and patterns and got started.  I actually started this quilt top on the last retreat I went to in June.


I really do love chain piecing!


The pieces in the top were quite large, so it went together quickly!


The center medallion measured 45x45!  I told you the pieces were large.


This is a king sized bed, so all I would do is widen the two inner borders to make it fit properly.


Details:  100x100
               From: Fons & Porter's - Love of Quilting
               Jessica's Rose Garden
               Designer: Toby Lischko

Now she is off to NFQ to be quilted.  I wonder how they will quilt this lovely flimsy?

Linking to:  Anything Goes Monday!  Tuesday Archives at Val's Quilting Studio!
Related Posts Plugin for WordPress, Blogger...